A summary of methods and techniques for extracting 3D models and textures from games and 3D applications — from GPU rippers to photogrammetry.
Introduction
There are several ways to grab models and textures from a running game. I split them into two groups:
- Lethal way — breaks the EULA
- Non-lethal way — no reverse engineering involved
Why would you want to do this?
- For fun — just mess around with the assets.
- Study how GFX is made — topology, UV layouts, level design.
- Study how the engine works — see Adrian Courrèges’ GTA V rendering study for a great example.
- Learn programming — nobody wants to stare at a textured cube forever. Use real assets.
- Speedrun optimization — some tools expose trigger volumes and collision boxes. Useful for finding exploits.
- 3D printing — guide here.
- 3D edits / cinematics — e.g. CS:GO 3D-Edit.
- Total conversions — e.g. Duke Nukem 3D ‘Forever’ in Serious Sam 3.
Lethal way
This breaks every legal agreement with the vendor. You’re not supposed to reverse engineer or redistribute their intellectual property. But it’s fun, most hardcore fans don’t care, and as long as you don’t share ripped content commercially — nobody is going to come after you.
Tools
File extraction tools — purpose-built reverse engineering tools that crack proprietary formats.
- Xentax Forum — large community focused on game file format RE.
Graphics analyzers / profilers — capture everything the GPU processes in a single frame: geometry, textures, shaders, draw calls.
Ripper tools — grab geometry directly from the video buffer. Same principle as analyzers, but focused on asset extraction.
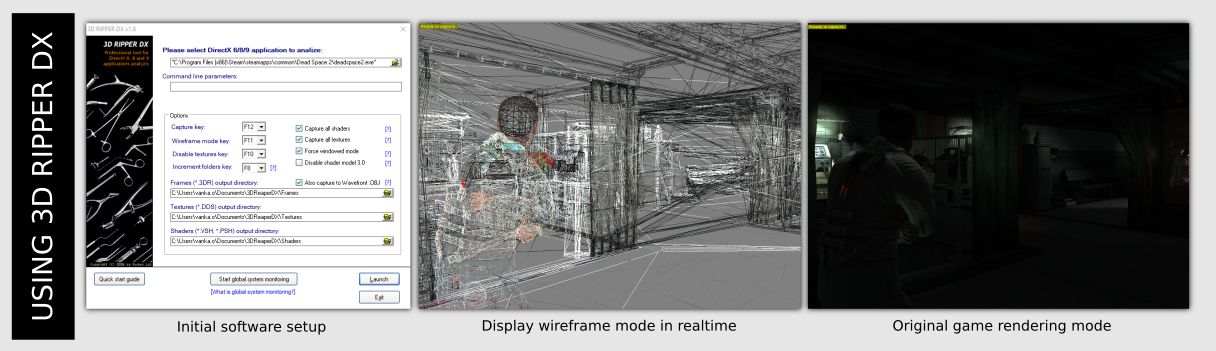
- 3D Ripper DX — old but works for DX6/8/9 titles.
Installation password: ripper
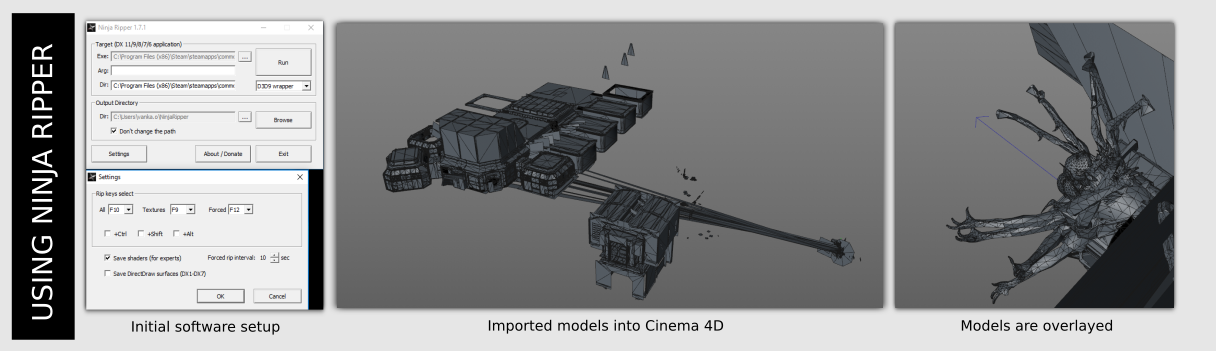
- Ninja Ripper — DX9, 10, 11 and newer. Source on GitHub.
- GameAssassin — Xentax usage guide
Before you start
A few things to keep in mind before using any ripper or analyzer:
- Know which Graphics API the game uses. If the tool doesn’t support it, it won’t work.
Some games ship with anti-RE protection that blocks profilers or disassemblers entirely.
-
Frame capture freezes the application. You can’t capture in real-time — every grab pauses the game for seconds or even minutes.
- Everything you grab comes through the rendering engine. The engine manages all vertex data, polygons, UVs, and textures before sending them to the GPU. You’re intercepting that pipeline.
Because of this, you’ll also capture hidden data that exists in video memory but isn’t visually shown:
- Light cones (volumetric effects)
- Portal volumes (indoor/outdoor culling)
- Trigger areas (boxes, null axes)
- LOD meshes
- Collision shapes (boxes, cylinders, spheres)
Example: Alien Isolation + Dead Space 2
I picked these titles not out of love, but because they lack community extraction tools. This proves the approach works even without dedicated format support.
- Graphics analyzer — Alien: Isolation (DX11, Creative Assembly)
- Ripper tools — Dead Space 2 (DX9, Visceral Games / EA)
Graphics Analyzers
RenderDoc was used to capture frames from Alien: Isolation. It intercepts DX/GL/VK calls and lets you inspect every draw call, texture, shader, and buffer in the captured frame.
Ripper Tools
Software used:
- Dead Space 2 — Steam version
- 3D Ripper DX
- Ninja Ripper
- Autodesk 3D Studio Max 2010 — import/export
- Maxon Cinema 4D — viewing
3D Ripper DX
Grabs frame data — models, textures, and shaders. Models are saved as .3DR files, which require 3D Studio Max 2009–2014 with the included import plugin. Textures come as DDS, shaders as plain text.
Shaders are in compiled bytecode. To read them you need to understand the DX9 HLSL fixed-function instruction set. See this reference.
For detailed usage, follow this guide.
Ninja Ripper
Same principle as 3D Ripper DX, but no wireframe mode. Outputs .RIP files — importable via a Python plugin for 3D Studio Max (included in the /tool directory).
For detailed usage, follow this guide.
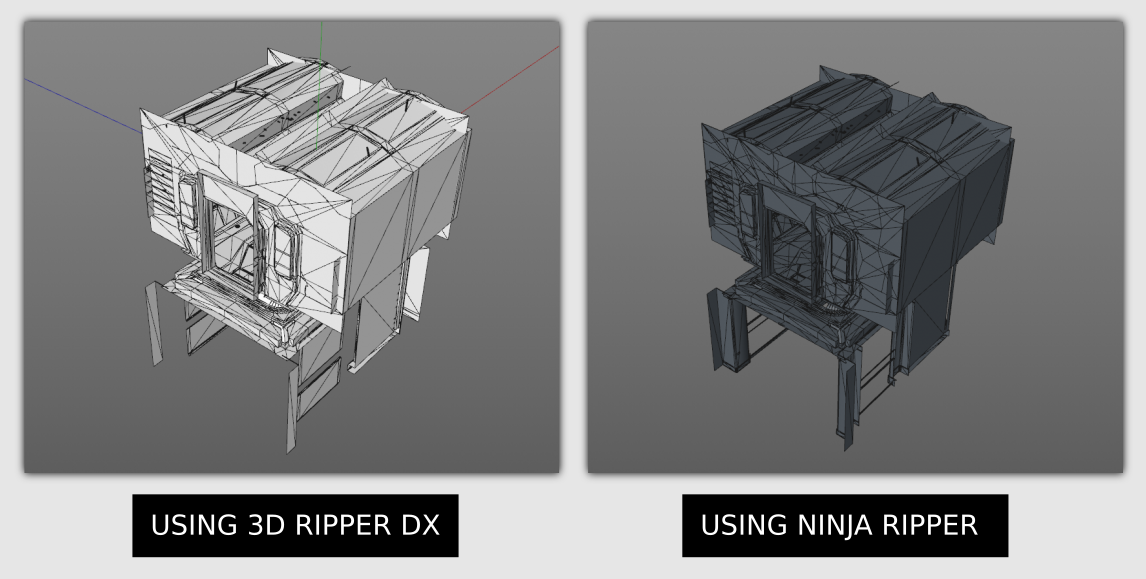
Comparing Data
The key difference: Ninja Ripper captures the scene before GPU shader transforms — characters stay in T-pose, geometry has no deformation or rotation applied. 3D Ripper DX captures what’s on screen after all transforms.
Conclusion
Each tool has its use case. Need a “diorama” with models in motion? 3D Ripper DX. Need clean, undeformed assets in their bind pose? Ninja Ripper.
Non-lethal way
Photogrammetry
Take hundreds of screenshots from different camera angles, feed them into a reconstruction tool, and get a textured 3D model out. Simple concept, heavy on compute time. See the Agisoft guide (page 8, chapter 2) for the theory.
You’re not reverse engineering anything or cracking file formats — you’re just taking screenshots.
Software
- Agisoft Metashape — used in the examples below
- 3DF Zephyr Free
- Autodesk 123D Catch
- OpenMVG
- VisualSFM
Example: Doom 2016
New to Metashape? Follow this video guide.
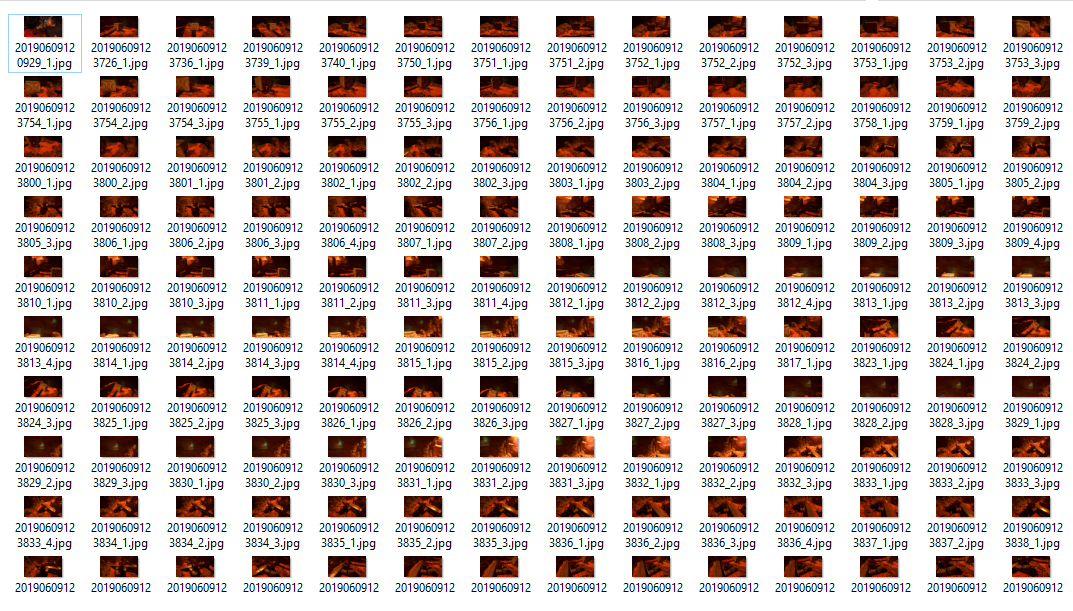
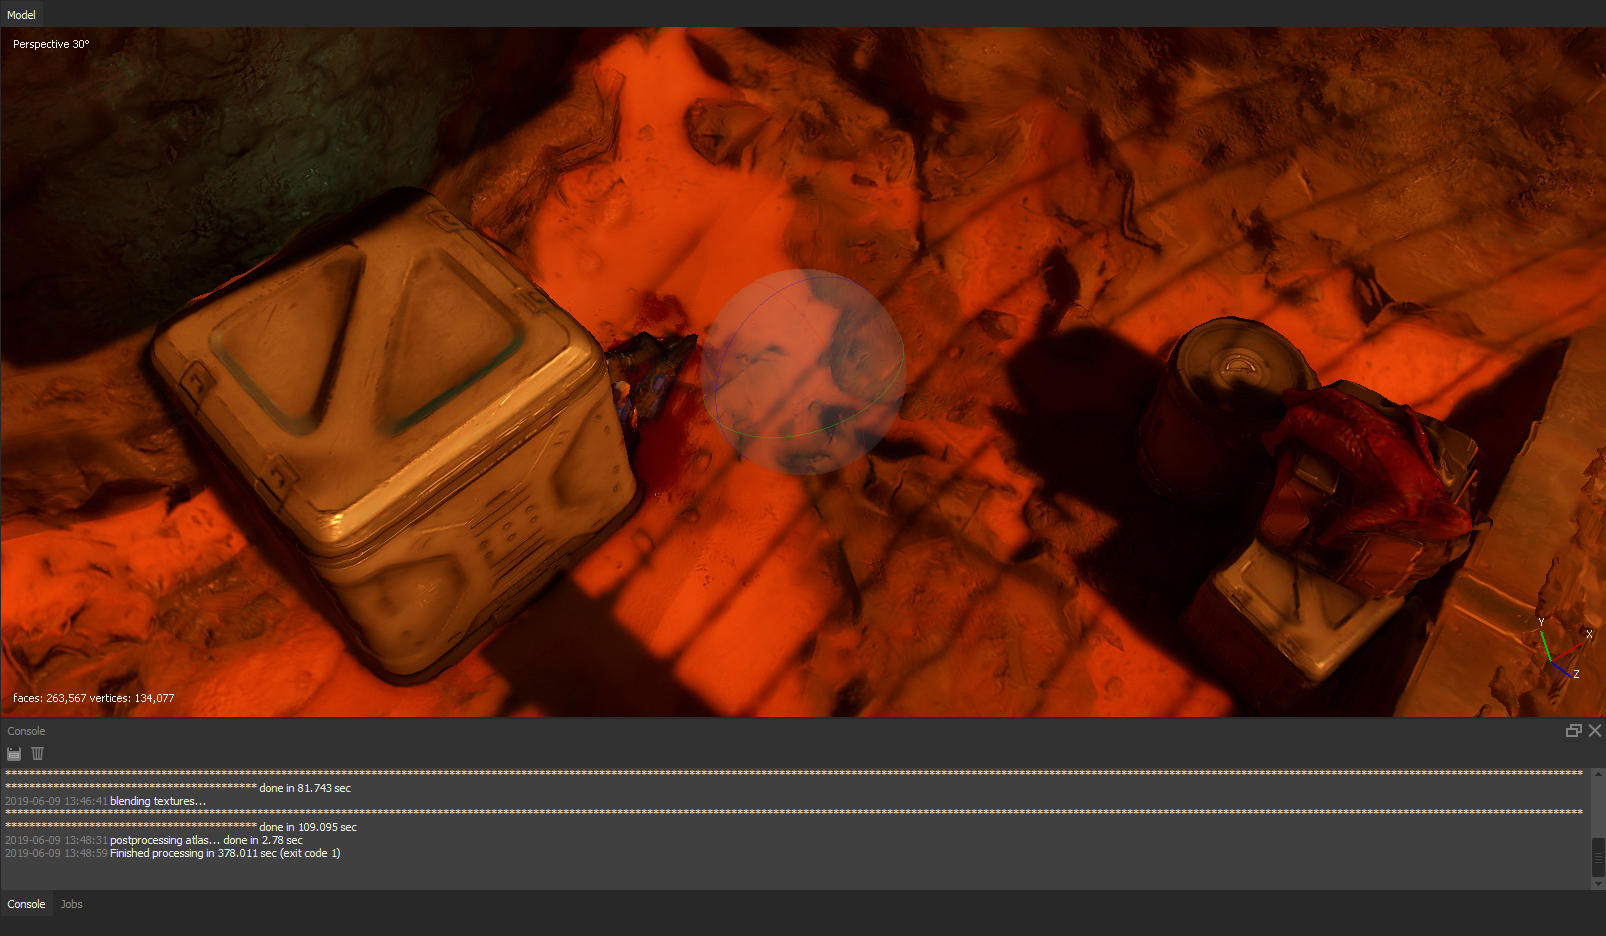
I used Doom 2016 (Steam) with the built-in Photo Mode. Around 300 screenshots from the free camera. Most are slightly blurred because I forgot to disable motion blur — still worked fine.
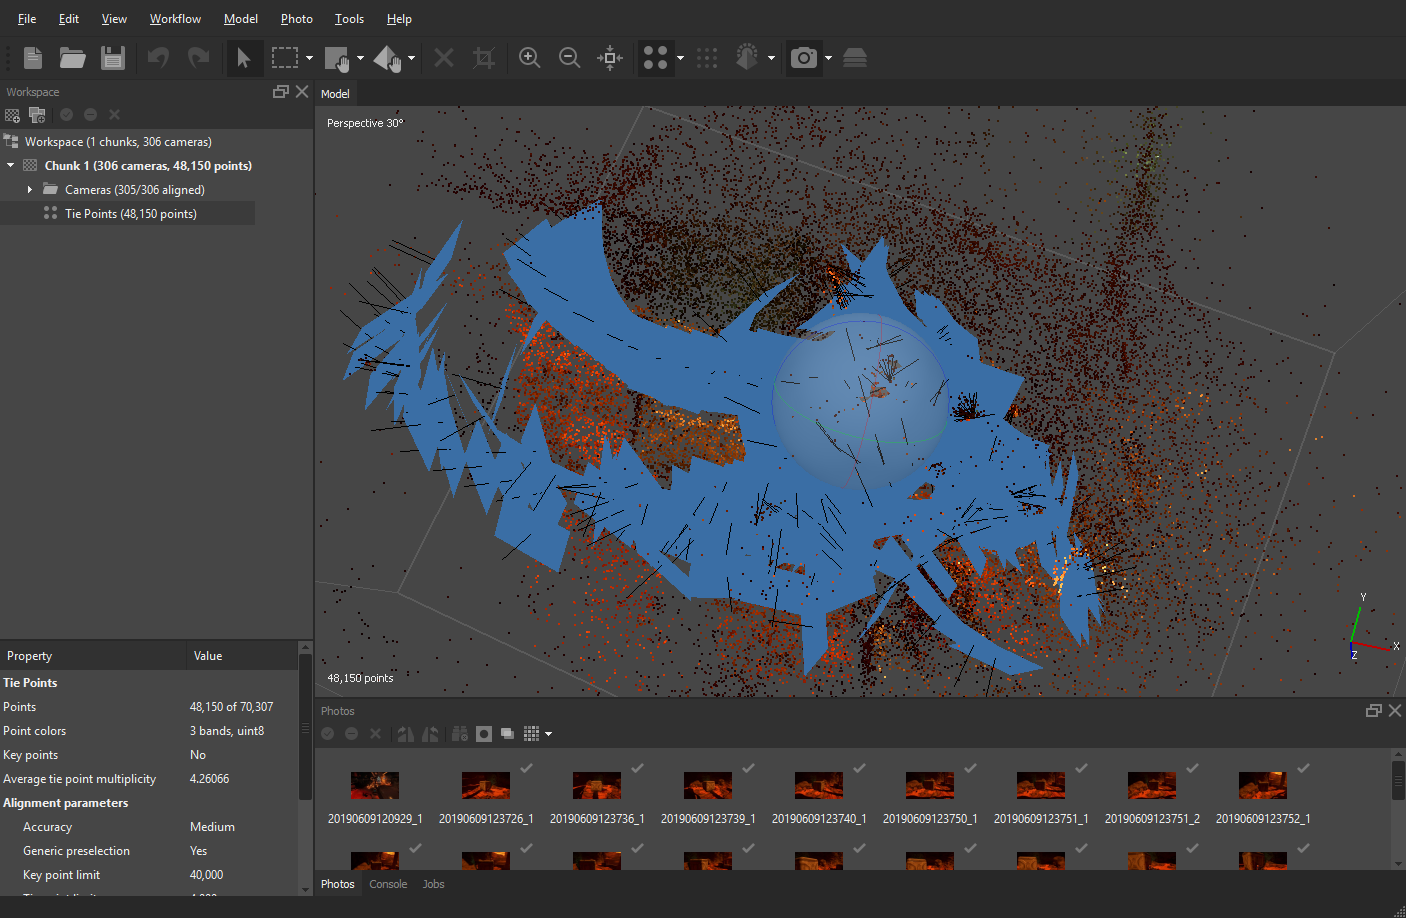
Drop the photos into Agisoft Metashape and run Photo Alignment to generate a point cloud:
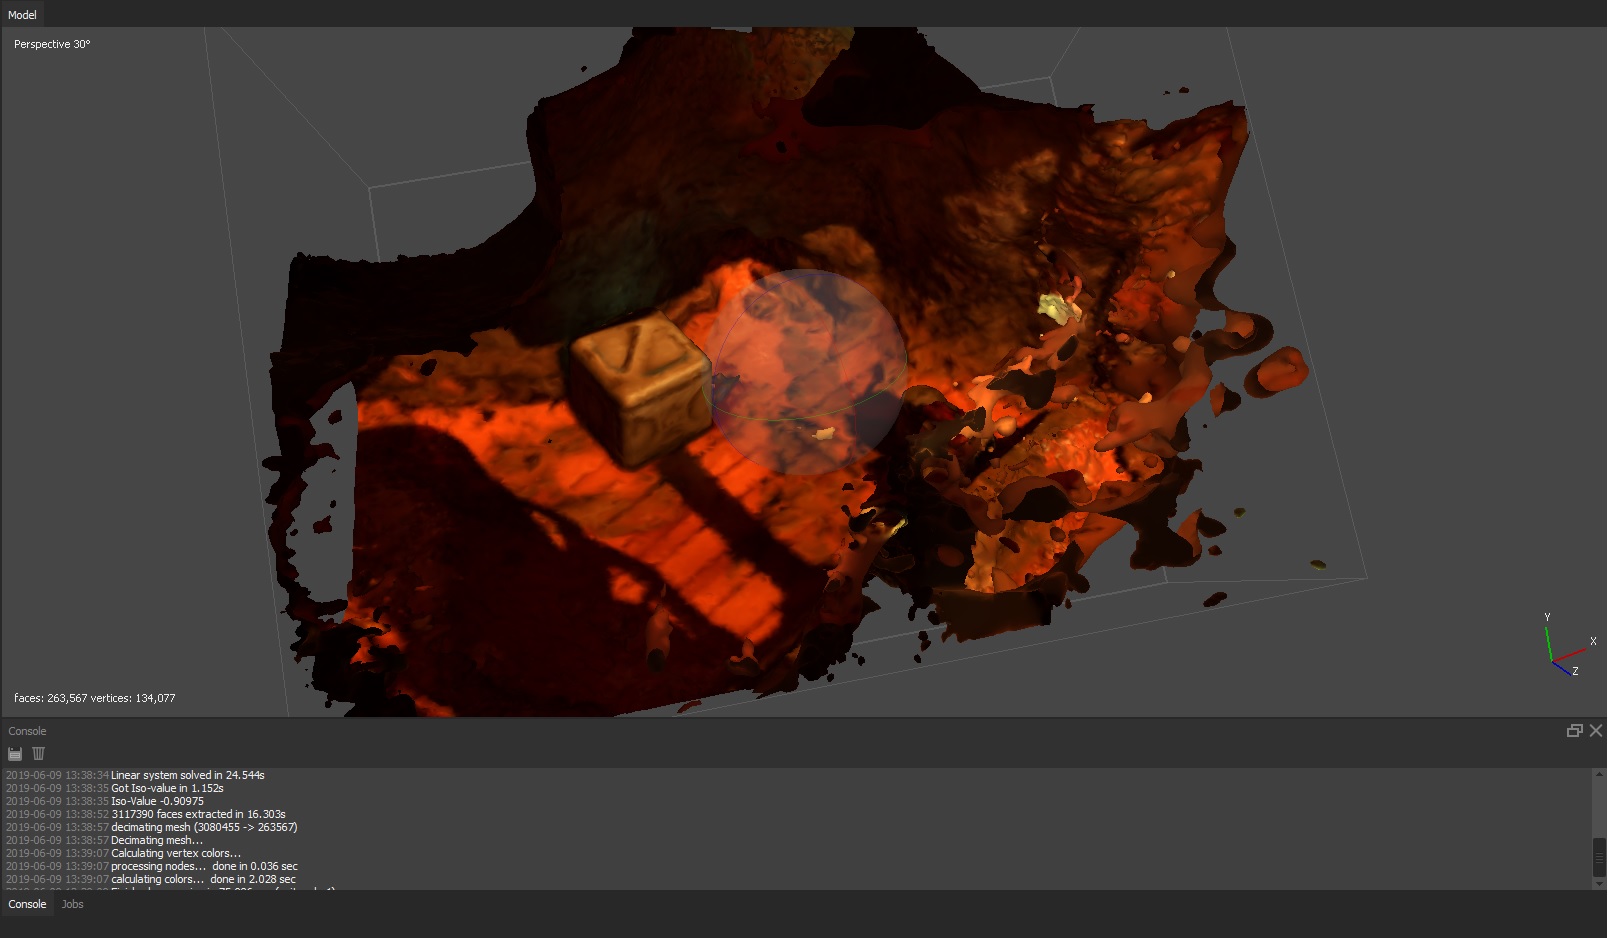
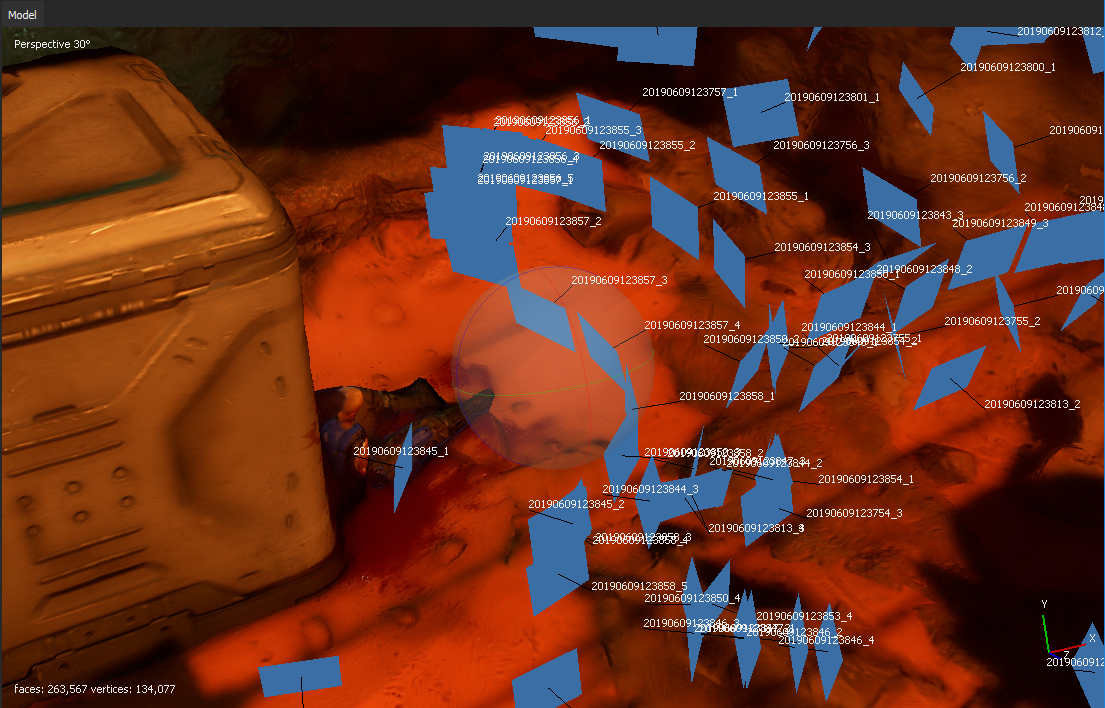
Then Build Mesh from the point cloud:
For higher texture resolution, run Build Texture at a larger size. I used 8K (4× the source resolution of 1920×1080):
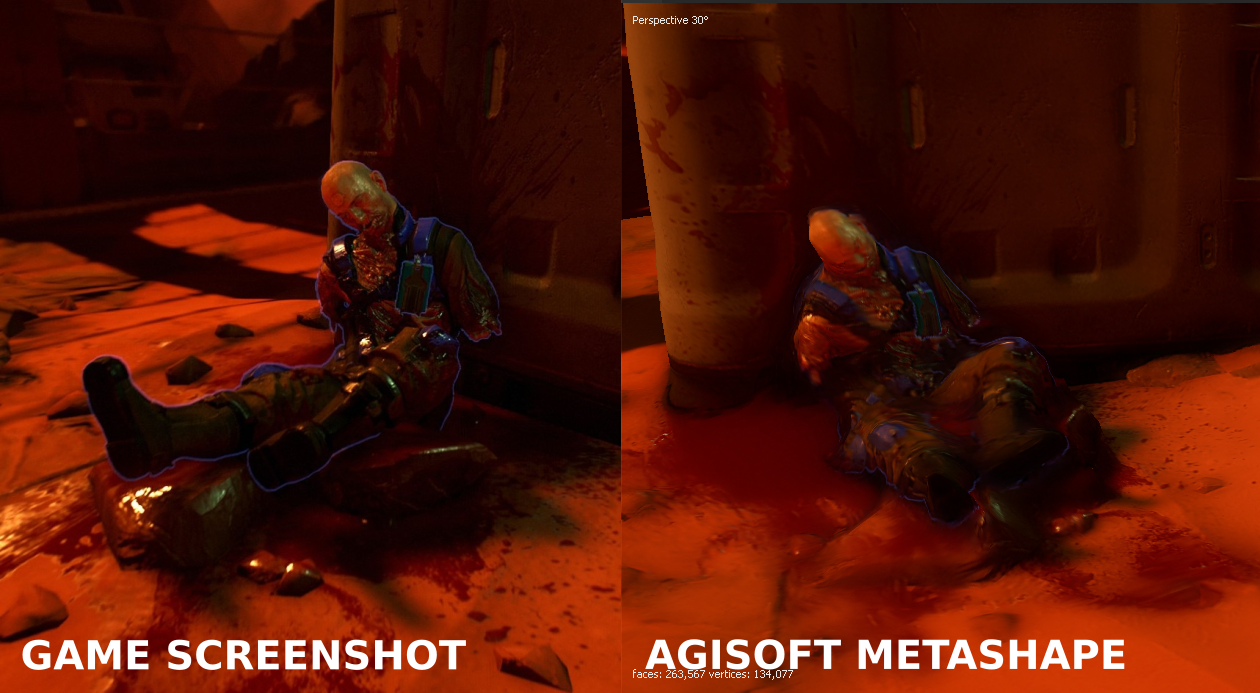
Final quality comparison:
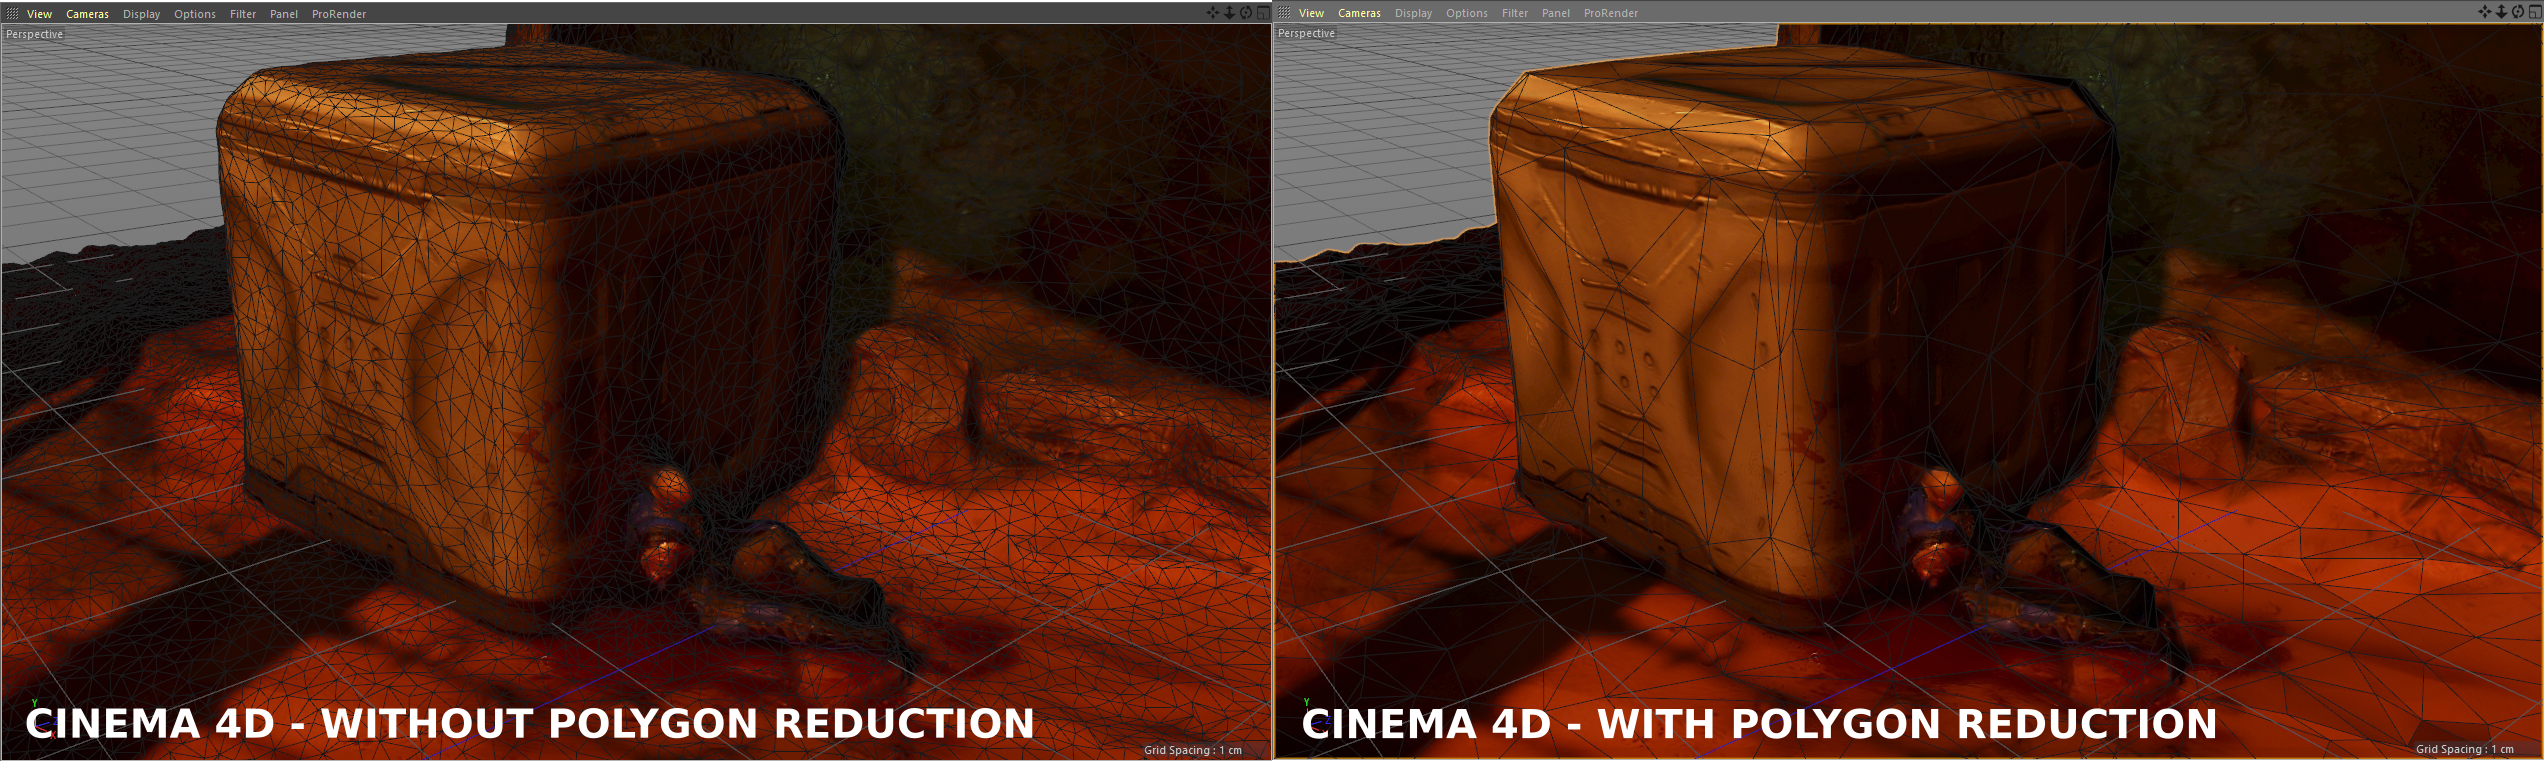
For mesh optimization, use Simplygon, InstaLOD, or Cinema 4D’s built-in Polygon Reduction:
Summary
| Data | Pros | Cons | Note |
|---|---|---|---|
| Models | Generated | Single mesh | Can be large, needs optimization |
| Textures | Generated | Single atlas | May have incorrect UVs |
| Shaders | Baked into texture | Not extracted | Lighting is baked in |
| Legal | No EULA violation | — | Just screenshots |