I’ve been staring at Doom 3’s renderer since I was a teenager. Twenty years later, I finally replaced it.
Introduction
What follows is a writeup of a GPU-accelerated path tracer I built inside id Software’s Doom 3, using the dhewm3 source port as a base. It intercepts dhewm3’s draw call pipeline at the backend, extracts scene geometry and lighting data, builds a bounding volume hierarchy on the GPU, and evaluates physically based light transport — all inside a twenty-year-old engine that was never designed for any of this.
I first played Doom 3 on an AMD Duron 700 MHz with a Radeon 9250 — hardware I still have in the closet. The per-pixel lighting, the dynamic shadows, the way a single flashlight beam could make a hallway feel like a place — that rewired what I wanted to do with my life. By 2008 I was building primitive engines around the Doom 3 SDK. A year later I hacked together a spherical path tracer following smallpt and tokaspt. The code was ugly. It rendered something. That was enough.
The goal was always to combine these two threads — the engine I grew up studying and the rendering technique I’d been circling for years. Projects like Schied’s Q2VKPT (2019) demonstrated that real-time path tracing inside a classic id engine was feasible. Doom 3’s GPL’d source, explicit lighting model — every light is a placed entity with position, color, radius, and projection parameters, no baked lightmaps — and dhewm3’s modern build system made it the ideal target.
The approach: intercept the geometry and lights dhewm3 submits each frame, upload everything to CUDA, build a BVH, path trace the scene, and blit the result back through OpenGL. No engine rewrite. No new asset pipeline. Just a renderer_cuda/ directory sitting next to the existing renderer/ and a CMake flag to enable it.
Source code: github.com/aknavj/dhewm3-cupt
System Architecture
The core idea: replace the GL rasterization backend with a CUDA path tracing pipeline. dhewm3 calls RB_DrawView() once per frame to rasterize everything visible. I replaced that with RB_CUDA_DrawView(), which intercepts the same data structures and pushes them through six stages instead. Figure 1 shows the control flow.
Figure 1. Frame-level control flow — original GL rasterizer (left) and CUDA path tracer replacement (right).
 DOOM 3 FRAME                              CUDA PATH TRACER
 ===========================               ===========================

 idSession::Frame()
       |
       v
 idRenderWorld::
   GenerateAllInteractions()
       |
       v
 idRenderBackend::
   ExecuteBackEnd()
       |
       v
 +---RB_DrawView()---+                     RB_CUDA_DrawView()
 |  (GL rasterizer)  | --- replaced by --->       |
 |                    |                     +------+------+
 | for each drawSurf  |                     |             |
 |   GL_DrawElements  |                  iterate       iterate
 | for each light     |                  drawSurfs     viewLights
 |   stencil shadows  |                     |             |
 |   light pass       |                     v             v
 +--------------------+               AddTriangle()  AddLight()
       |                              GetOrSetMaterial()
       v                                    |
 GL SwapBuffers                             v
                                      EndFrame()
                                        | cudaMemcpy --> device
                                        | build LBVH
                                        v
                                      RenderView()
                                        | primary rays
                                        | BVH traversal
                                        | material eval
                                        | direct light + shadows
                                        | indirect bounce
                                        v
                                      ToneMap()
                                        | HDR --> LDR
                                        v
                                      CopyToBackbuffer()
                                        | cudaMemcpy --> host
                                        v
                                      glDrawPixels()
                                        |
                                        v
                                      [screen]
Scene extraction. The first stage walks backEnd.viewDef->drawSurfs — the same list the GL renderer would consume — and copies vertex positions, normals, tangents, UVs, and indices into flat arrays. Entity transforms are baked into world space on the CPU. Materials are sourced from idTech 4’s idMaterial shader stages and flattened into a cudaMaterial_t struct. Lights are extracted from backEnd.viewDef->viewLights, with point, directional, and projected types mapped to a unified cudaLight_t.
GPU upload. All scene data is transferred to device memory via cudaMemcpy. Materials and textures are pointer-cached across frames; only new entries are uploaded. Lights are rebuilt every frame to account for animation.
BVH construction. A Linear BVH is built entirely on the GPU using the Karras (2012) algorithm — four custom kernels plus a Thrust radix sort. This is detailed in the Acceleration Structure section.
Path tracing. One thread per pixel, launched in 16×16 tiles. Each thread fires a primary ray with sub-pixel jitter, traverses the BVH, evaluates materials, samples direct lighting, and optionally bounces for indirect illumination. Results accumulate into a float4 HDR framebuffer. Listing 1 shows the core of the per-pixel kernel — primary ray generation through the bounce loop.
Listing 1. Per-pixel path tracing with sub-pixel jitter and iterative bounce evaluation.
// per-pixel RNG seeded from pixel position + frame index
unsigned long long pixelSeed =
    (unsigned long long)(y * width + x) * 1000003ULL
    + (unsigned long long)frameIndex * 999983ULL;
curandState randState;
curand_init(pixelSeed, 0, 0, &randState);

for (int sample = 0; sample < samplesPerPixel; sample++) {
    // primary ray with sub-pixel jitter
    float jitterX = curand_uniform(&randState) - 0.5f;
    float jitterY = curand_uniform(&randState) - 0.5f;
    float u = ((float)(x) + 0.5f + jitterX) / (float)width  * 2.0f - 1.0f;
    float v = ((float)(y) + 0.5f + jitterY) / (float)height * 2.0f - 1.0f;

    cudaRay_t ray;
    ray.origin    = cameraPos;
    ray.direction = normalize(cameraForward
                   + u * cameraRight * tanHalfFovX
                   + v * cameraUp    * tanHalfFovY);

    float pathThroughput[3] = { 1, 1, 1 };
    float pathRadiance[3]   = { 0, 0, 0 };

    for (int iteration = 0; iteration < maxPasses && depth < maxDepth;
         iteration++) {
        cudaHitInfo_t hitInfo;
        if (!IntersectBVH(ray, vertices, triangles, bvhNodes,
                          triIndices, materials, hitInfo)) {
            // sky or miss — accumulate and break
            break;
        }
        // evaluate material, sample direct light, bounce...
    }
}
The outer sample loop executes the configured samples-per-pixel count. The inner iteration loop handles bounces and transparent passes — alpha-tested surfaces, decals, and glass do not increment the bounce depth, allowing a ray to pass through many transparent layers before consuming a bounce.
Tone mapping. A post-processing kernel converts HDR to LDR using one of three selectable operators — Reinhard, ACES, or Uncharted 2 — followed by gamma correction.
Blit. The final pixel buffer is copied back to host memory and drawn with glDrawPixels. No GL-CUDA interop is used. This is the simplest possible output path — not the fastest.
The renderer exposes eight selectable visualization modes via the r_cuMode CVar, each isolating a different pipeline stage. Figures 2 through 7 show the same frame rendered across these modes.
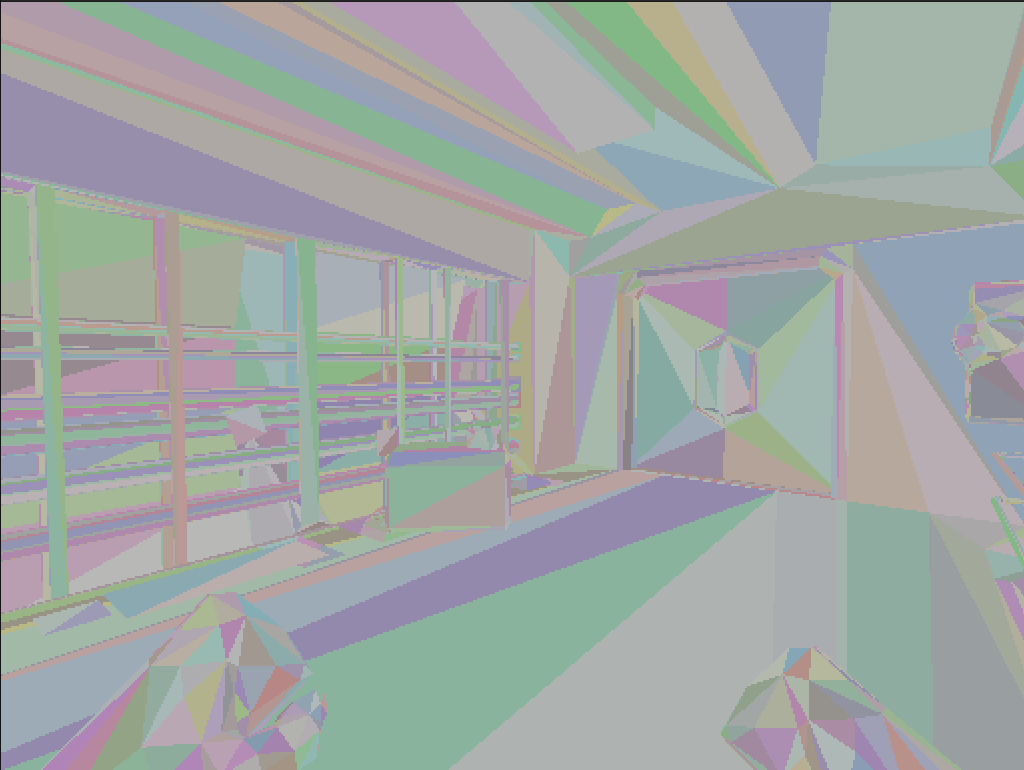 Figure 2.
 r_cuMode 1 — BVH traversal debug visualization with random per-triangle coloring.
 Figure 3.
 r_cuMode 4 — Albedo texture output.
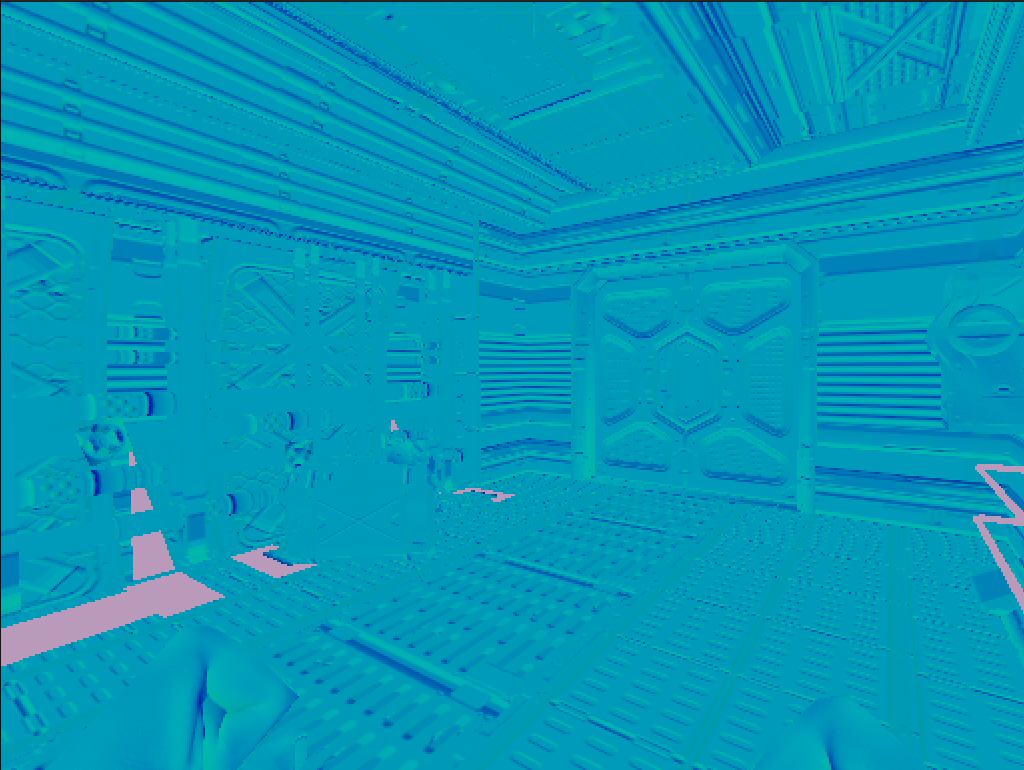 Figure 4.
 r_cuMode 5 — Normal map visualization.
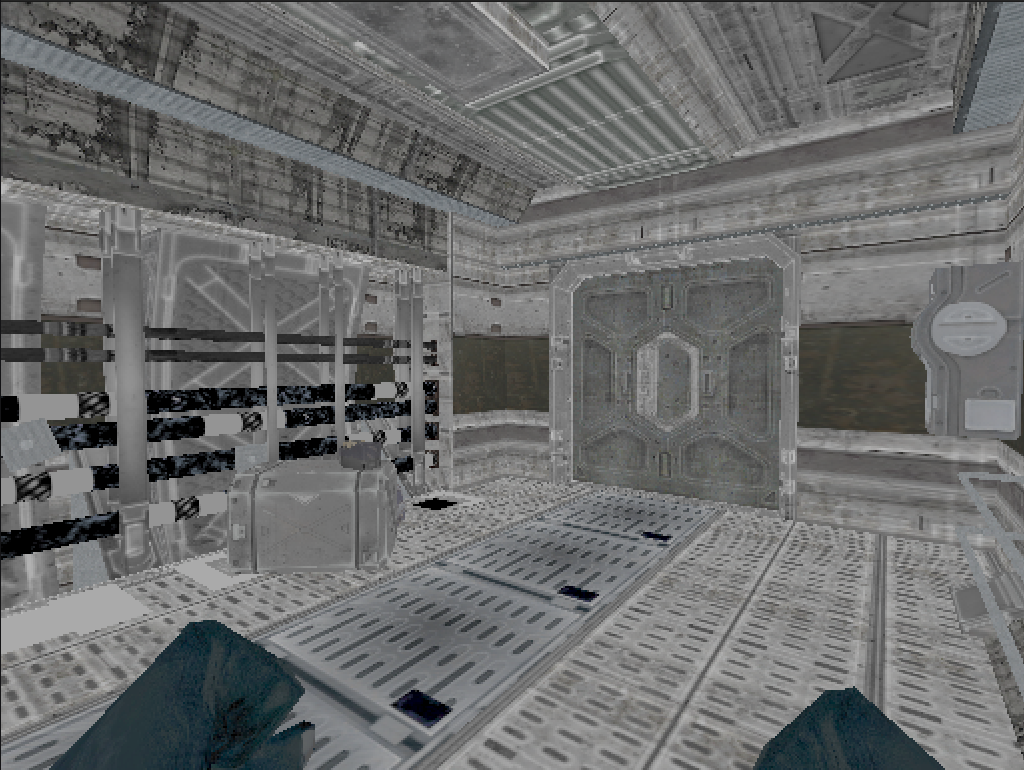 Figure 5.
 r_cuMode 6 — Specular map visualization.
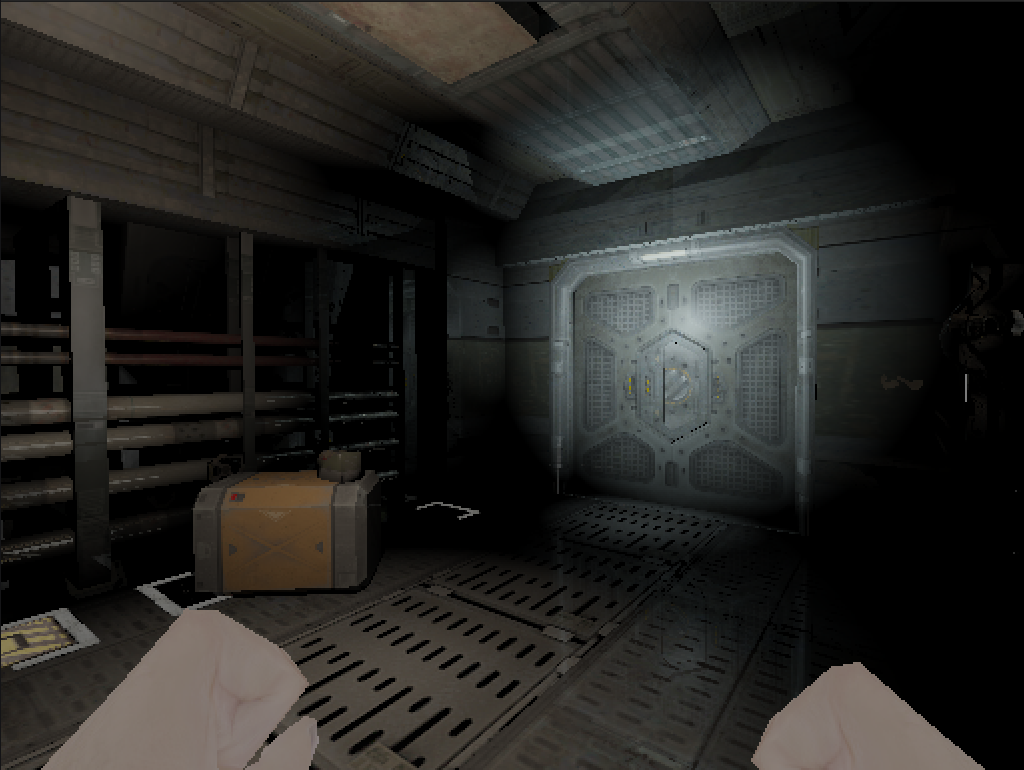 Figure 6.
 r_cuMode 7 — Whitted-style ray tracing with direct lighting, Blinn-Phong specular, and mirror reflections.
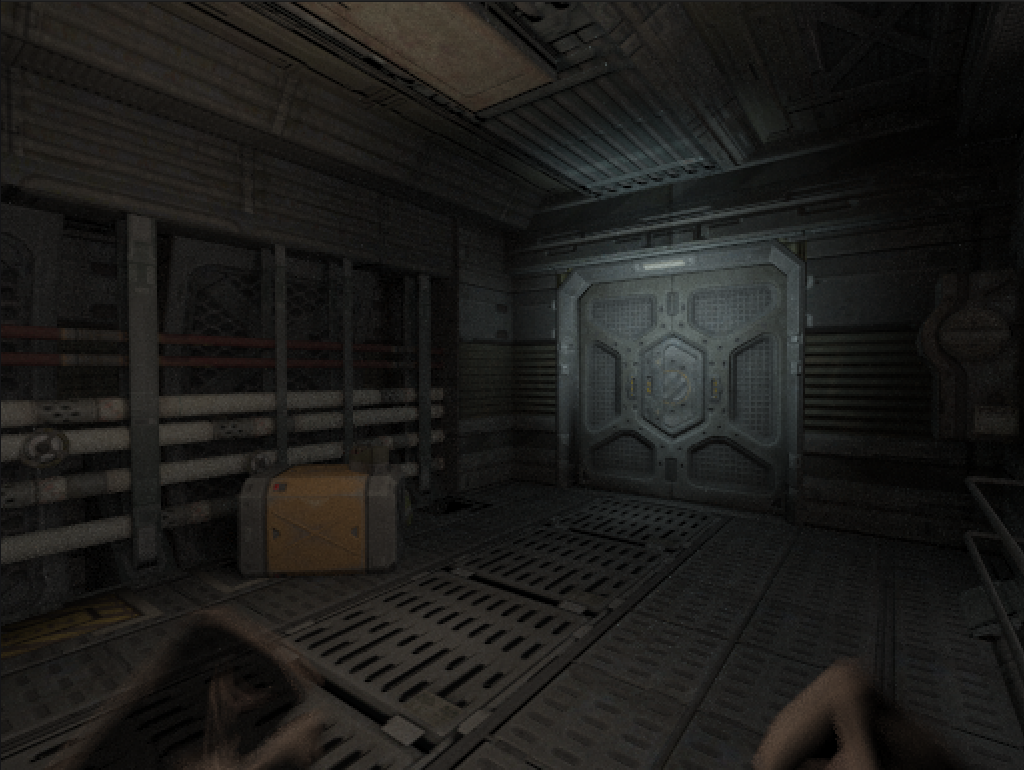 Figure 7.
 r_cuMode 0 — Full PBR path tracing, converged at approximately 32 accumulated frames.
Acceleration Structure
Doom 3 levels can push hundreds of thousands of triangles, and the BVH must be rebuilt every frame because entities move. A CPU build was out of the question — too slow by an order of magnitude.
The construction follows Karras’s 2012 paper. Five phases, each a separate CUDA kernel — except the sort, which delegates to Thrust.
Morton codes. Each triangle’s centroid is normalized to $[0, 1]$ within the scene’s axis-aligned bounding box and encoded into a 30-bit Morton code — 10 bits per axis, interleaved via expandBits. This maps three-dimensional spatial proximity to a one-dimensional sort key along a space-filling Z-curve.
Radix sort. Thrust’s sort_by_key sorts the Morton codes and their associated triangle indices in parallel. This is the most computationally expensive phase and the one that forces a host synchronization — the CUDA stream must drain before Thrust takes over the default stream. Thrust’s radix sort is a production-grade GPU primitive; attempting to replace it with a custom implementation would be counterproductive.
Radix tree. An internal node kernel determines the split position for each node using the delta function — __clz applied to XOR’d Morton codes, with index-based tiebreaking for duplicates. Each internal node receives left and right child pointers. Parent pointers are stored for the subsequent bottom-up pass.
Leaf init. A separate kernel writes leaf nodes containing per-triangle bounding boxes, epsilon-padded to prevent grazing-ray intersection misses.
Bottom-up AABBs. Starting from every leaf, each thread walks up the parent chain. An atomic counter per internal node ensures that the second child to arrive computes the union AABB while the first child exits immediately. This guarantees that every internal node is visited exactly once.
The custom kernels run on a dedicated CUDA stream. Thrust’s sort_by_key, however, forces a stream sync and runs on the default stream. I tried every reasonable alternative. It’s the one unavoidable host-side stall in the build pipeline.
Traversal. At render time, each thread performs a stack-based BVH walk with front-to-back child ordering. The thread maintains a 128-entry local stack and pushes the nearer child last so it is popped first. Listing 2 shows the traversal loop.
Listing 2. Stack-based BVH traversal with front-to-back ordering.
int stack[128];
int stackPtr = 0;
stack[stackPtr++] = 0;  // root

while (stackPtr > 0 && stackPtr < 128) {
    int nodeIndex = stack[--stackPtr];
    const cudaBVHNode_t& node = nodes[nodeIndex];

    // slab test against node AABB
    float tmin = ray.tMin;
    float tmax = foundHit ? hitInfo.t : ray.tMax;
    for (int i = 0; i < 3; i++) {
        float invD = 1.0f / ray.direction[i];
        float t0 = (node.bounds[i] - ray.origin[i]) * invD;
        float t1 = (node.bounds[i + 3] - ray.origin[i]) * invD;
        if (invD < 0.0f) { float tmp = t0; t0 = t1; t1 = tmp; }
        tmin = fmaxf(tmin, t0);
        tmax = fminf(tmax, t1);
        if (tmax <= tmin) goto skip_node;
    }

    if (node.leftChild == -1) {
        // leaf — test triangles
        for (int i = node.firstPrimitive;
             i < node.firstPrimitive + node.primitiveCount; i++) {
            if (IntersectTriangle(ray, vertices, triangles[triIndices[i]],
                                  materials, hitInfo)) {
                hitInfo.triangleIndex = triIndices[i];
                foundHit = true;
            }
        }
    } else {
        // push children — nearer child on top
        float leftDot  = dot(leftNode.center  - ray.origin, ray.direction);
        float rightDot = dot(rightNode.center - ray.origin, ray.direction);
        if (leftDot < rightDot) {
            stack[stackPtr++] = node.rightChild;  // far
            stack[stackPtr++] = node.leftChild;   // near (popped first)
        } else {
            stack[stackPtr++] = node.leftChild;
            stack[stackPtr++] = node.rightChild;
        }
    }
    skip_node:;
}
The front-to-back ordering causes early intersections to tighten tmax rapidly, pruning large subtrees before any triangle test executes. For Doom 3’s indoor environments — dense with occluding walls — this reduces traversal cost by roughly half compared to arbitrary child ordering.
Material Conversion
The material system proved to be the most underestimated component. Doom 3’s idMaterial is not a simple texture-per-surface mapping — it is a multi-stage shader pipeline. A single material can declare bump, diffuse, specular, and ambient interaction stages, blend modes, alpha tests, vertex colors, and animated texture registers. The path tracer requires a substantially simpler representation: albedo, normal, roughness, metallic, and a set of behavioral flags. Bridging this gap required a conversion layer that walks each material’s shader stages and extracts what it can.
Diffuse stages provide the albedo texture and base color tint — one texture, one color multiplier. This is the straightforward case.
Bump stages provide normal maps. Doom 3 uses the RXGB encoding — the X component occupies the alpha channel, Y green, Z blue. The kernel reconstructs tangent-space normals accordingly. When the tangent frame is degenerate, the kernel fabricates an orthonormal basis from the geometric surface normal.
Specular stages provide a specular intensity map. Roughness and metallic values are derived heuristically from specular luminance — higher luminance yields lower roughness and higher metallic weight. A PBR artist would find this objectionable. It maps the visual weight correctly for the majority of Doom 3’s surfaces, and that is what matters for faithful reproduction.
Coverage type determines alpha test thresholds for perforated materials — grates, fences — and blend modes for translucent glass and additive particles. Emission is inferred from materials with no interaction stages: ambient-only materials like light panels, screens, and HUD elements become emissive surfaces. Vertex colors pass through for particles and decals that modulate per-vertex. Texture transforms — scale, rotation, scroll — come from shader registers and get applied during UV computation.
Materials are pointer-cached using an idHashIndex keyed on the idMaterial pointer. A material is converted once and reused across frames until a texture overflow forces a full cache flush.
Light Evaluation
idTech 4 defines three light types: point, parallel (directional), and projected (spotlight with a texture frustum). All three are extracted from the engine’s viewLight_t list each frame and evaluated during path tracing.
Point lights. Attenuation follows a windowed quadratic function using Doom 3’s axis-aligned light radius as the falloff boundary:
\[A(d) = \left(1 - \left(\frac{d}{r}\right)^2\right)^2 \tag{1}\]This provides a smooth falloff to zero at the radius boundary — no hard cutoff, no inverse-square singularity at $d = 0$.
Projected lights. Each projected light carries four frustum planes (lightProject[4]) that define a textured light volume. The path tracer evaluates these planes to compute UV coordinates within the projection, samples the light texture at those coordinates, and applies a falloff gradient along the frustum depth. Cone angle and edge softness are derived from the frustum geometry. Getting this wrong makes every spotlight in the game look like a featureless white cone — a mistake I made many times before the implementation stabilized.
Direct light sampling. For each shading point, shadow rays are cast toward up to r_cuMaxLightSamples randomly selected lights, weighted by $\frac{N_{\text{lights}}}{N_{\text{samples}}}$ to maintain an unbiased estimator. The shadow test is transparency-aware: it walks through alpha-tested, transmissive, and blended surfaces, attenuating the shadow ray per-material rather than treating every intersection as fully opaque. This produces correct shadows through chain-link fences, tinted glass, and particle effects.
Soft shadows are achieved by jittering the light sample position within the light’s spatial extent. Point lights jitter within their lightRadius3 bounds; spotlights jitter along their right and up axes. The jitter scale is configurable via r_cuSoftShadowScale.
Indirect illumination. A single-bounce global illumination pass fires a cosine-weighted hemisphere sample from the primary hit point. The indirect ray walks through transparent surfaces (up to four steps) until it encounters an opaque surface, evaluates direct lighting there including a shadow test, and returns the result as incident radiance. The bounce fires at a configurable probability (r_cuIndirectProb). It fills the ambient that makes Doom 3’s pitch-black corridors read as physical spaces instead of floating geometry. The first time I saw light bleeding around a door frame that the original renderer left pitch black, I knew the architecture was right.
Shading Model
I went with a Cook-Torrance microfacet BRDF using the GGX distribution — the same shading model behind Unreal Engine 4 (Karis, 2013) and most modern PBR pipelines. It handles everything from rough diffuse to sharp metallic reflections in one framework.
Normal distribution function. The GGX (Trowbridge-Reitz) distribution defines the microfacet orientation probability:
\[D(\mathbf{h}) = \frac{\alpha^2}{\pi\left((\mathbf{n} \cdot \mathbf{h})^2(\alpha^2 - 1) + 1\right)^2} \tag{2}\]where $\alpha$ is the roughness parameter and $\mathbf{h}$ is the half-vector. GGX produces heavier tails than Blinn-Phong, yielding broader specular highlights at grazing angles — the visual quality responsible for the wet-looking metal floors throughout Doom 3’s Mars base.
Geometry term. Smith’s method with the Schlick-GGX approximation accounts for microfacet self-shadowing and masking:
\[G(\mathbf{n}, \mathbf{v}, \mathbf{l}) = G_1(\mathbf{n} \cdot \mathbf{v}) \cdot G_1(\mathbf{n} \cdot \mathbf{l}) \tag{3}\]It’s what makes rough surfaces lose energy at steep viewing angles instead of blowing out.
Fresnel term. The Schlick approximation models reflectance variation with viewing angle:
\[F(\theta) = F_0 + (1 - F_0)(1 - \cos\theta)^5 \tag{4}\]The diffuse component uses energy-conserving Lambertian reflectance: $k_d = (1 - F)(1 - \text{metallic})$, scaled by $\frac{\text{albedo}}{\pi}$. Metallic surfaces receive no diffuse contribution — all color is carried through specular reflection.
Specular correction. One detail cost me a full week of debugging. Doom 3’s original renderer doubles the specular contribution in its interaction shaders: result = diffuse + specular * 2. Every surface in the game was tuned under this assumption. Without the corresponding boost, the path-traced scene appeared physically correct but emotionally flat — every metal surface looked dead. The CVar r_cuSpecularBoost (default 2.0×) compensates for this, matching the artists’ expectations rather than the textbook.
Volumetric Scattering
This feature is pure indulgence — Doom 3 shipped without volumetric lighting, and adding it is computationally expensive. But I wanted to see those flashlight beams cutting through darkness the way they exist in memory, not the way they actually rendered in 2004.
The kernel ray-marches between the camera and the first surface intersection. At each march step, the kernel casts a shadow ray toward the light source, computes distance attenuation, evaluates a Henyey-Greenstein phase function for directional scattering, and accumulates in-scattered radiance modulated by Beer’s law transmittance. Spotlights enforce a minimum forward scattering bias ($g \geq 0.7$) so that their beams read as visible cones rather than diffuse fog.
Projected light textures are sampled during the march as well — a light with a colored gel projects that color into the participating medium, not only onto surfaces. This is the most expensive feature in the renderer and the one I am least willing to remove.
Artist-Faithful Rendering
The math behind path tracing is well-documented. The harder problem — by far — was reproducing the specific visual identity of Doom 3: not a generic PBR renderer that happens to load Doom 3 assets, but something that looks like the actual game with every artistic decision intact.
No ambient fill. The path tracer trusts the placed lights exclusively — no environment map, no sky bleed, no constant ambient term. If a corridor contains no idLight entities, it remains black. That oppressive darkness is Doom 3’s visual signature. Introducing hemispheric ambient would be trivial and would destroy the feel.
Blend-mode classification per hit. The original renderer composites alpha-tested grates, additive particles, modulate-blended decals, and translucent glass through draw-order blending. The path tracer classifies each intersection — pass-through (attenuate throughput), additive (add energy), modulate (multiply throughput), or bounce — so that transparent passes do not consume bounce budget. A single ray may traverse 20 decal layers as one logical bounce. noShadows opaque decals — blood splatters, bullet marks — receive special-case detection: light the decal, composite over throughput, continue the ray. Without this classification, every decal becomes an opaque wall.
The rule behind all of this: match what the original renderer did, not what a physically based renderer should do. The artists at id Software tuned every surface under assumptions that were never portable to a different rendering architecture. Honoring those while adding what the original couldn’t — soft shadows, indirect illumination, volumetric scattering — that’s the real design constraint.
Limitations and Runtime Characteristics
This is a real-time-ish path tracer for a game engine, not a production renderer. Every architectural decision reflects that constraint.
One-bounce indirect illumination. The GI pass fires a single hemisphere sample at the primary hit point and evaluates direct lighting at whatever surface it reaches. No recursive multi-bounce GI, no photon mapping, no irradiance caching. One bounce fills the ambient sufficiently to make rooms feel solid. Additional bounces would multiply ray count exponentially for marginal perceptual gain in Doom 3’s tight, heavily occluded corridors.
Cosine-weighted hemisphere sampling. Bounce directions are sampled proportional to $\cos\theta$ — the simplest reasonable importance sampling strategy. No BRDF importance sampling, no multiple importance sampling (MIS). MIS would substantially reduce variance for glossy surfaces and small bright light sources — it is the standard in production renderers. Without it, specular highlights converge slowly and caustics are effectively invisible. The tradeoff is implementation simplicity: one sampling strategy, one PDF, no bookkeeping.
There’s no spectral rendering, no subsurface scattering, no caustics. All computation is RGB — no wavelength-space dispersion or fluorescence. Every surface is opaque at the shading point — no internal scattering for skin, wax, or marble. Specular-to-diffuse light transport paths are invisible because the renderer traces exclusively from the camera. For Doom 3’s metal corridors and demon-infested laboratories, none of these omissions are perceptible.
No denoiser. The renderer relies on brute-force temporal accumulation — each frame adds to a persistent HDR buffer, and the tone mapper divides by the accumulated frame count before LDR conversion. Camera movement resets the buffer. At 4 SPP per frame, the first frame is grainy but recognizable; after 50 frames, direct lighting is clean; after several hundred, soft shadows converge. Russian roulette terminates low-energy paths probabilistically with inverse-probability compensation to maintain an unbiased estimator. A firefly clamp caps individual sample brightness to prevent single hot pixels from dominating the average.
The scene is bounded by hard compile-time constants — 1M triangles, 2K textures, 512 lights, 2M BVH nodes — allocated once at startup via cudaMalloc. Transparency-aware shadow rays walk through at most 8 surfaces before terminating. Every pixel receives the same SPP regardless of local variance. These limits are generous for Doom 3 but render the architecture unsuitable for open-world scenes or film-resolution assets.
Runtime configuration. The entire system is gated behind a CMake flag (-DCUDA_PATHTRACER=ON) and a runtime CVar (r_cuDraw 1). With the flag disabled, dhewm3 runs its standard OpenGL renderer unmodified. Approximately 50 CVars control SPP, bounce depth, Russian roulette thresholds, soft shadow scale, sky color, fog density, and tone mapping operator — all adjustable from the Doom 3 console during gameplay. At 0.5× render scale (the default), the renderer achieves interactive rates on RTX hardware.
The result is a renderer that produces plausible images at interactive rates — sufficient to walk through Doom 3 and observe real light transport interacting with real geometry. The missing features aren’t things to bolt on later. They’re architectural decisions that would mean rewriting the kernel from scratch. This path tracer answers one question: what does Doom 3 look like with physically based light transport? Everything else is a different project.
Discussion
The most instructive failure mode was silent visual degradation — the renderer produced an image, but the image was wrong in ways that required A/B comparison with the GL backend to identify. Three cases stand out.
Specular energy loss. Early builds produced physically plausible frames where every metal surface appeared matte. The Cook-Torrance evaluation was correct. The bug was upstream: Doom 3’s interaction shaders apply a 2× multiplier to the specular term, and every material in the game was authored under that assumption. A side-by-side comparison of a single brushed-steel panel — GL on the left, CUDA on the right — made the discrepancy obvious. Without the reference, the path-traced result looked merely conservative, not broken. This class of bug — correct math producing wrong results because the data was tuned for different math — recurred throughout the project.
Tangent frame degeneracy. Certain func_static entities — particularly pipes and trim geometry — rendered with inverted or scrambled normals. The issue was not in the RXGB reconstruction but in the tangent vectors themselves: some meshes shipped with zero-length or collinear tangent/bitangent pairs. The GL renderer never exposed this because its per-pixel lighting computed tangent space differently. The fix — detecting degenerate frames and fabricating an orthonormal basis from the geometric normal — was trivial once diagnosed. Diagnosis took three days because the visual artifact (dark splotches on curved surfaces) suggested a BVH intersection bug, not a shading input problem.
Projected light UV precision. The lightProject[4] frustum planes produce UV coordinates through four dot products. Floating-point precision in the frustum depth calculation caused banding artifacts at light boundaries — visible as hard rings in what should have been smooth falloff gradients. The GL renderer masked this through its per-fragment stencil-and-blend pipeline, which never evaluated the projection as a continuous function. Switching the depth interpolation to a normalized formulation with an explicit epsilon floor eliminated the banding.
Each of these bugs shared a common structure: the path tracer exposed an implicit contract between Doom 3’s data and its original renderer that was never documented, because neither side needed to be explicit about it. Replacing the renderer broke every such contract simultaneously. The debugging process was less about fixing algorithms and more about reverse-engineering artistic and engineering assumptions from twenty-year-old render output.
Future Work
The renderer works — it answers the question it was built to answer, and at interactive rates. Optimization isn’t the immediate priority.
Next up is porting the kernels to OpenCL. Right now the project is locked to NVIDIA hardware, which limits both the potential audience and what I can test against. OpenCL would open the path tracer to AMD and Intel GPUs without requiring a full architectural rewrite — the kernel structure, BVH layout, and material pipeline are not CUDA-specific. The CUDA-to-OpenCL translation is mostly mechanical (kernel launch syntax, memory allocation API, built-in math functions), though Thrust’s sort_by_key would need a replacement — likely a custom radix sort or a dependency on a library like CLRadixSort.
Once the compute backend is portable, the optimization surface becomes worth revisiting: two-level acceleration structures to avoid full BVH rebuilds, CUDA-GL or CL-GL interop to eliminate the glDrawPixels round trip, and importance sampling strategies beyond cosine-weighted hemispheres. None of these change what the renderer produces. They change how fast it gets there.
References
- Project source: aknavj/dhewm3-cupt — the full CUDA path tracing fork of dhewm3
- Christoph Schied, Q2VKPT — Quake 2 Vulkan Path Tracer, 2019
- Tero Karras, Maximizing Parallelism in the Construction of BVHs, Octrees, and k-d Trees, NVIDIA Research, HPG 2012
- dhewm3 — Doom 3 GPL Source Port
- id Software, Doom 3 GPL Source Code, 2011
- Matt Pharr, Wenzel Jakob, Greg Humphreys, Physically Based Rendering: From Theory to Implementation, 4th Edition
- Brian Karis, Real Shading in Unreal Engine 4, SIGGRAPH 2013
- James T. Kajiya, The Rendering Equation, SIGGRAPH 1986
- Turner Whitted, An Improved Illumination Model for Shaded Display, Communications of the ACM, 1980